Flashing an LED PIC
Description
Today is our first session in PIC microcontroller lab, and we will begin with an experiment that flashes an LED on and off. While this looks very simple it is the best project to start because this makes sure that we successfully wrote the program, compiled it, loaded inside the PIC, and the circuit is correctly built on the breadboard.
In this lab session we will connect an LED to one of the port pin of PIC16F688 and flash it continuously with 1 sec duration.
Required Theory
You must be familiarized with,
- digital I/O ports (PORTA and PORTC) of PIC16F688
- direction control registers, TRISA and TRISC
- special function registers CMCON0 and ANSEL
If you are not then please read this first: Digital I/O Ports in PIC16F688.
Circuit Diagram
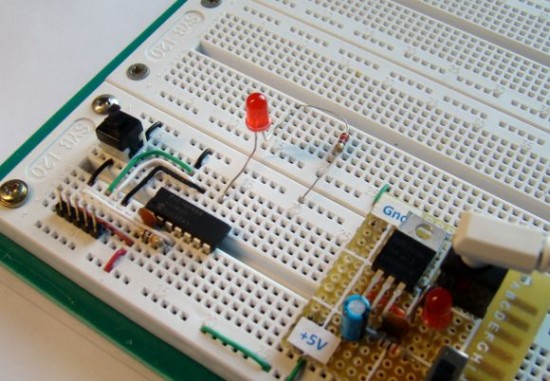
To our basic setup on the breadboard (read Getting Ready for the First Lab), we will add a light-emitting-diode (LED) to port pin RC0 (10) with a current limiting resistor (470 Ohm) in series. The complete circuit diagram is shown below.
Flashing LED circuit
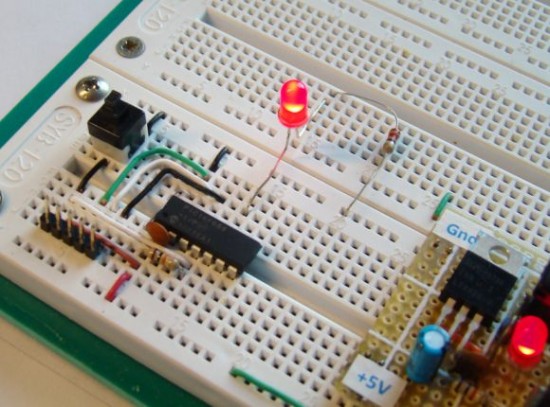
Prototyped circuit on the breadboard
Software
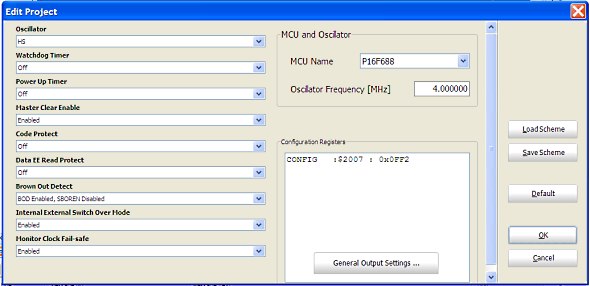
Open a new project window in mikroC and select Device Name as PIC16F688. Next assign 4.0 MHz to Device Clock. Go to next and provide the project name and the path of the folder. It is always a good practice to have a separate folder for each project. Create a folder named Lab1 and save the project inside it with a name (say, FlashLED). The mikroC project file has .mccpi extension. The next window is for "Add File to Project ". Leave it blank (there are no files to add to this project) and click next. The next step is to include libraries, select Include All option. Next, click Finish button. You will see a program window with a void main() function already included. Now, go to Project -> Edit Project. You will see the following window.
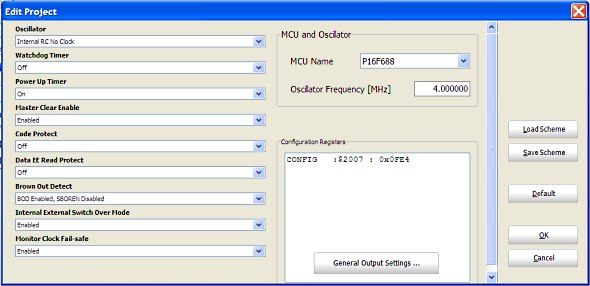
This window allows you to program the configuration bits for the 14-bit CONFIG register inside the PIC16F688 microcontroller. The device configuration bits allow each user to customize certain aspects of the device (like reset and oscillator configurations) to the needs of the application. When the device powers up, the state of these bits determines the modes that the device uses. Therefore, we also need to program the configuration bits as per our experimental setup. Select,
Oscillator -> Internal RC No Clock
Watchdog Timer -> Off
Power Up Timer -> On
Master Clear Enable -> Enabled
Code Protect -> Off
Data EE Read Protect -> Off
Brown Out Detect -> BOD Enabled, SBOREN Disabled
Internal External Switch Over Mode -> Enabled
Monitor Clock Fail-Safe -> Enabled
Note that we have turned ON the Power-Up Timer. It provides an additional delay of 72 ms to the start of the program execution so that the external power supply will get enough time to be stable. It avoids the need to reset the MCU manually at start up.
Read PIC16F688 datasheet for details on Configuration Word.
Appropriate configuration bit selection
Here's the complete program that must be compiled and loaded into PIC16F688 for flashing the LED. Copy and paste this whole program in your main program window. You have to delete the void main() function first that was already included. To compile, hit the build button, and if there were no errors, the output HEX file will be generated in the same folder where the project file is. Then load the HEX file into the PIC16F688 microcontroller using your programmer.
Output
You will see the LED flashing On and Off with 1 sec duration.
--
With Regards,
s.m.sethupathy,
sms communication,
Tanjore -1.
mobile :9944 186 173
www.questionpaperlink.co.cc
www.sethu-panguvarthagam.blogspot.com


Currently have 0 comments: